Nano Banana
Make Realistic 3D Figurines with Nano Banana: From Photo to Display-Ready Art
Nano Banana AI4 min read
Contents+
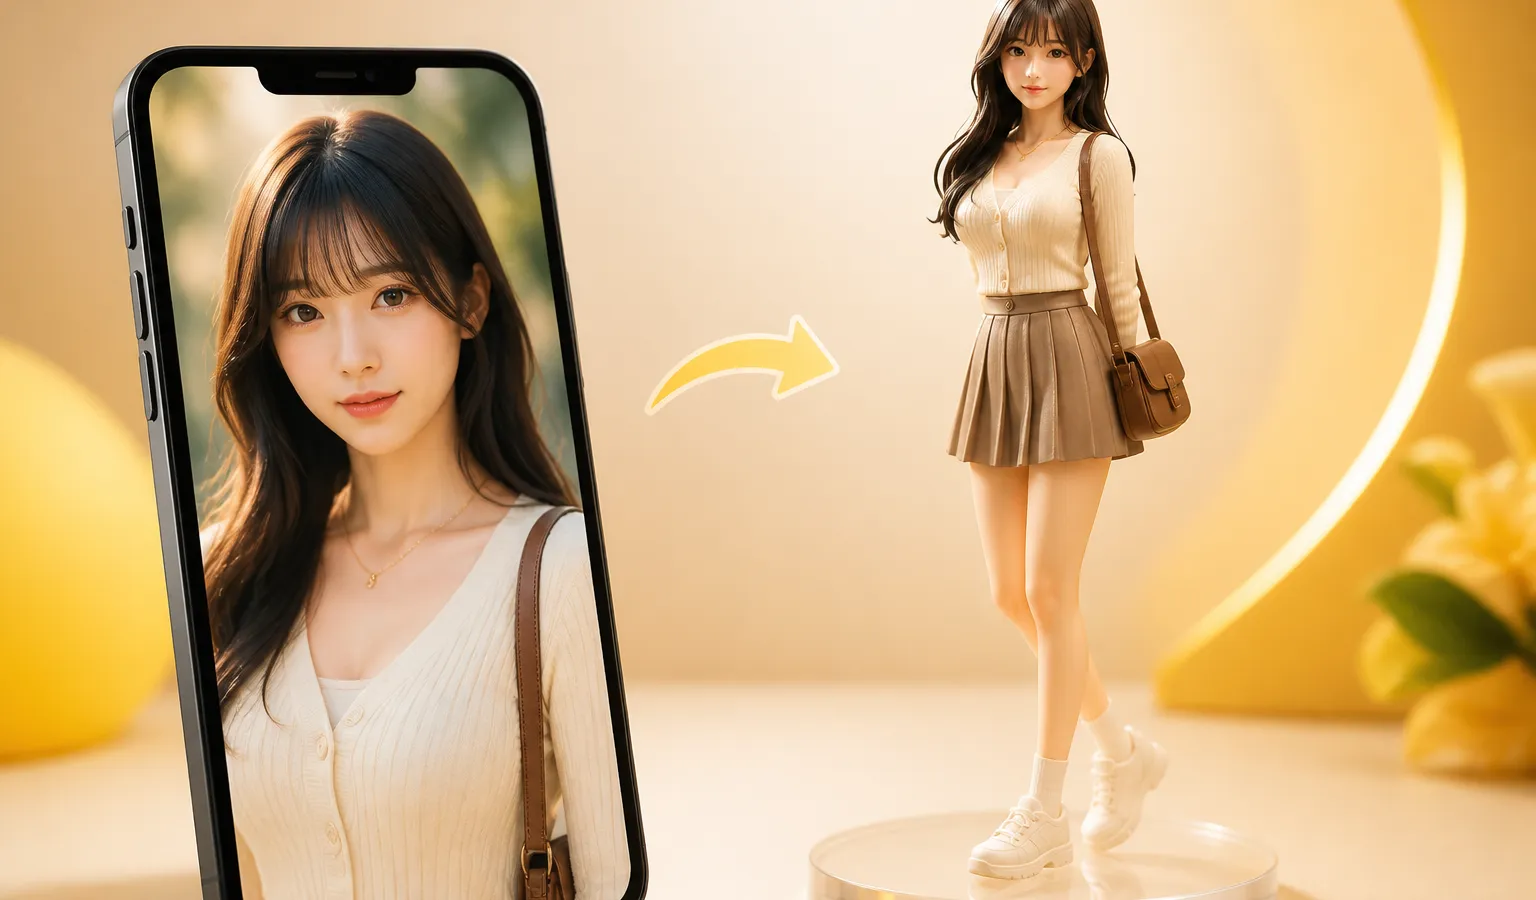
When customizing a real-person figurine, many people first generate a shelf-style visual mockup with AI: keep the likeness, but also show glossy PVC, a base, and studio product lighting. Nano Banana fits this step well—you can validate look and presentation without modeling or prototyping yet. Below we walk through prompts, reference images, and chat refinements from photo to display-ready 3D figurine art.
Why use Nano Banana for 3D figurine concepts
Traditional figurines need modeling, prototyping, and paint masters—slow and expensive. Nano Banana shines at the visual lock stage: validate pose, outfit, base, and packaging before you commit to real production.
It fits three common jobs:
- Custom realistic figurines of yourself or a client as a collectible PVC look
- IP / character figurine previews for shelf-style marketing shots
- E-commerce and social assets—hero images, detail pages, crowdfunding mockups
Start on nanobanana-ai.us with text-to-image or reference-driven generation.
What to prepare
- A clear front or 3/4 face reference (even light, sharp features, minimal occlusion)
- Figurine type: full-body standing, bust, or seated scene edition
- A short keyword pack:
PVC figure,collectible figurine,acrylic base,studio product photo
Workspace example:
https://app.nanobanana-ai.us/en/generate/image-tools/nano/
Step 1: Write figurine-focused prompts
For Nano Banana 3D figurine work, structure beats adjective spam:
- Identity — same person as the reference (hair, face, age feel)
- Figurine form — full-body PVC / 1/7 scale collectible / bust
- Material — glossy plastic, fine hair strands, printed eye makeup
- Outfit & color — keep the real outfit or restyle as a character set
- Base & set — clear acrylic base, soft side light, product studio
- Camera — eye-level or slight top-down product shot, shallow DOF
Example (full-body)
The same young woman as a 1/7 scale PVC collectible figurine, full-body standing pose, glossy plastic material, fine hair detail and printed eye makeup, wearing the same outfit as the reference, clear round acrylic base, studio product photography, soft side light, shallow depth of field, clean light backgroundExample (bust)
Bust figurine of the same person, shoulders-up, high-detail face, PVC sheen, detachable-headsculpt feel, black display base, commercial product photography, front eye-levelRule of thumb: lead with who + figurine + material, then lighting and base. That helps Nano Banana text to image lock “figure” instead of “another selfie.”
Step 2: Upload a reference to keep likeness
Text alone rarely holds facial identity. Recommended path:
- Upload a sharp portrait as reference
- State clearly: keep the same facial features and hairstyle
- Judge the first frame only on likeness and figurine readability
If the face drifts, regenerate or strengthen “same person” constraints—don’t grind ten edits on the wrong face.
Step 3: Chat refine from “person” to “shelf figure”
Nano Banana dialogue editing works best one change per turn:
- “Keep the person; make the material glossier PVC”
- “Add a clear acrylic base; leave everything else”
- “Clean product studio background; remove clutter”
- “Simplify clothing folds for a mass-produced paint finish”
| Issue | Fix in chat |
|---|---|
| Too photographic | Emphasize PVC, plastic sheen, collectible, product photo |
| Face drift | Reinforce same facial features; avoid redesigning the face |
| Busy background | Clean studio / light seamless only |
| Odd proportions | Specify 1/7 full-body or bust |
Step 4: Package art, colorways, and angles
After the hero look is locked, expand with the same subject:
- Window-box packaging mockups
- Seasonal / alternate outfits on one sculpt
- Front / side / back views (one prompt each, “same figurine”)
- Scenic bases and clear-effect parts
Still use first frame → single-variable chat edits.
Common pitfalls
- Writing only “3D” without “figurine” → you get CG character art, not shelf PVC. Add
PVC figure,collectible,acrylic base. - Soft or extreme-profile references hurt likeness—prefer sharp near-front faces.
- Changing outfit, base, and background in one turn causes drift.
- Treat outputs as design/marketing visuals, not production CAD.
Recap
- Prep a clear portrait reference
- Prompt with person + PVC figurine + material + base + studio light
- Generate a first frame in Nano Banana; check likeness and figure look
- Refine one variable per chat turn
- Expand to packaging and multi-angle shots when needed
With your photo ready, open nanobanana-ai.us and follow the structure above for a first collectible-figurine concept.